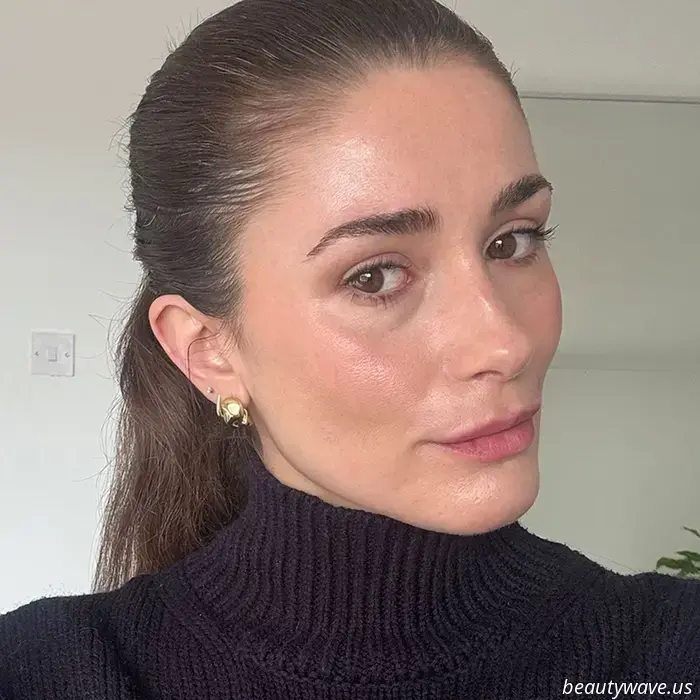
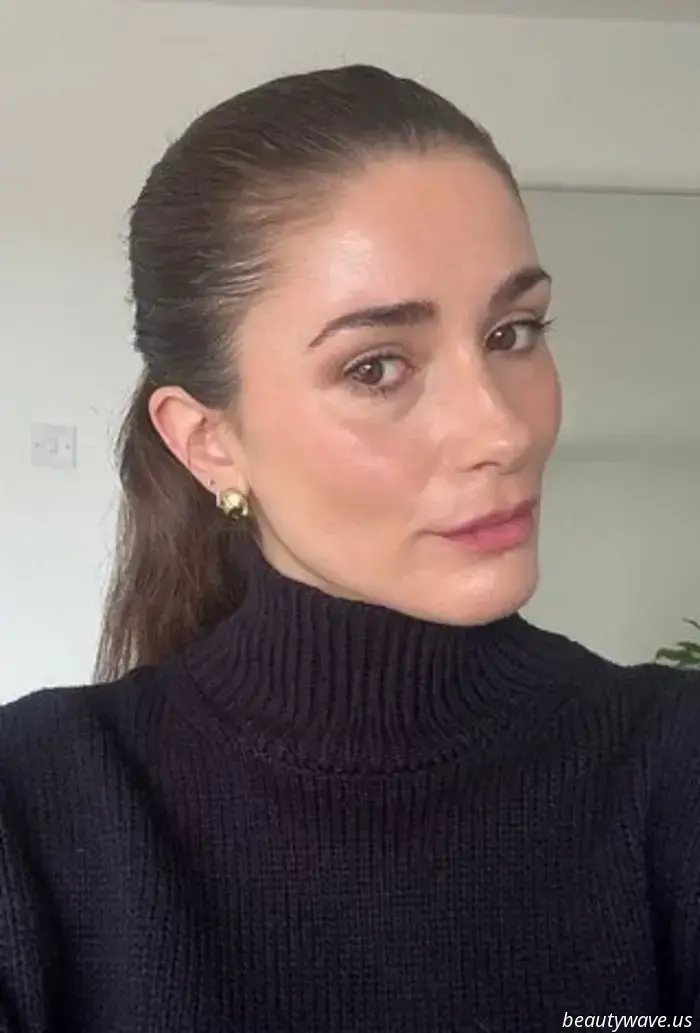
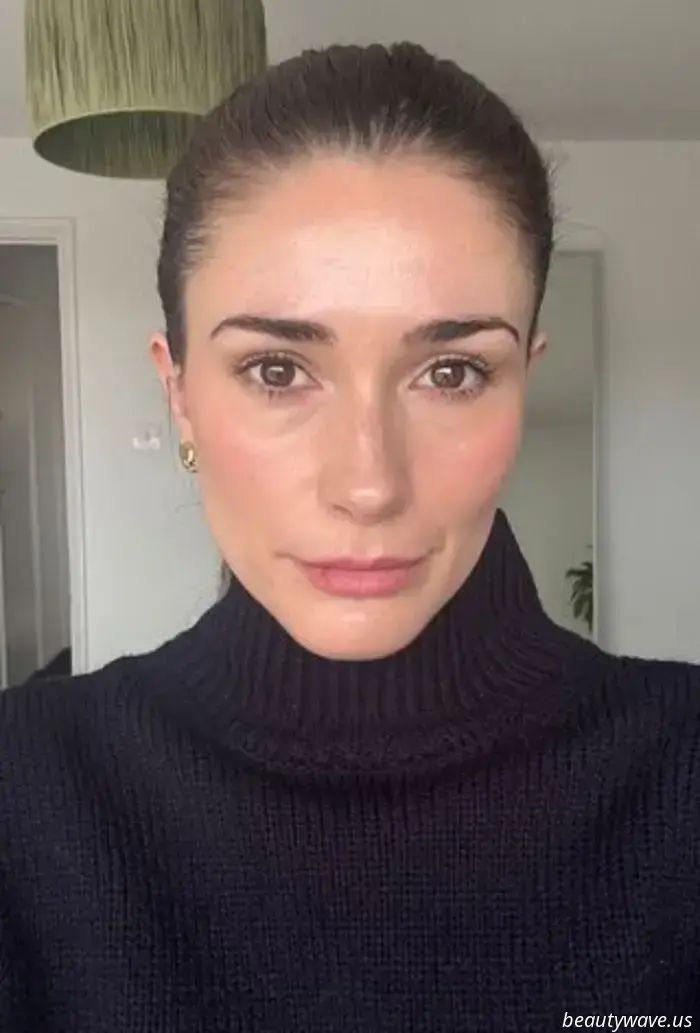
I Successfully Mastered At-Home Brow Lamination, and Now I'll Never Need to Purchase Brow Gel Again.
I recall when brow lamination was first introduced in UK salons, and I was among the first to give it a try. My brow hairs are very stubborn and do not cooperate even with the most powerful brow gels. While it’s said that brows should be sisters, not twins, the way my brows grow sometimes makes me wonder if they even recognize each other. A brow pencil can only offer so much help, but brow lamination gives them a more symmetrical look, keeps them in place all day, and makes them appear fuller and fluffier. Since brow lamination became available in salons, at-home kits have become more accessible and affordable, allowing you to achieve sculpted, fluffy brows without needing a professional. However, I must admit I’ve experienced quite a bit of trial and error while doing brow lamination at home. I’ve experimented with several kits and made numerous mistakes—hello, werewolf brows and frizzy hairs.
Now, after extensive testing, I believe I've finally achieved my desired effect for my brows. If you’re considering laminating your brows at home, I’d like to share my insights with you. Below is a step-by-step guide on how to laminate your brows at home, along with essential tips and tricks I’ve learned to help you get the best results for your brows.
### How To Laminate Your Brows At Home
First, before using any at-home brow lamination kit, you should perform a patch test at least 24 hours in advance to ensure you don’t have any adverse reactions to the solutions. A good spot for this is the inside of your arm or behind your ear.
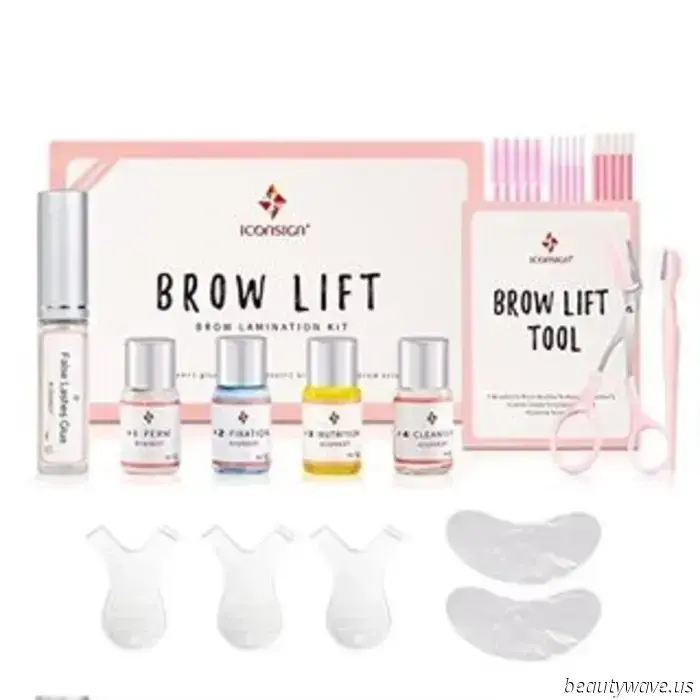
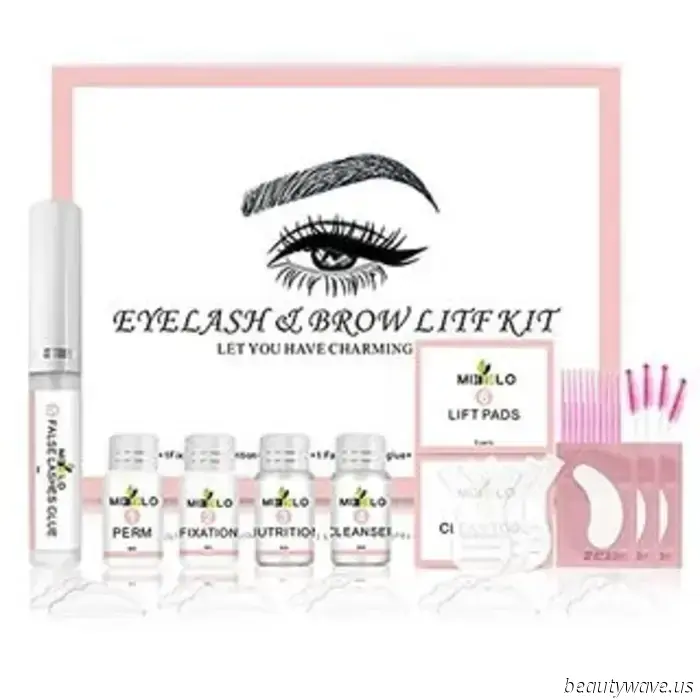
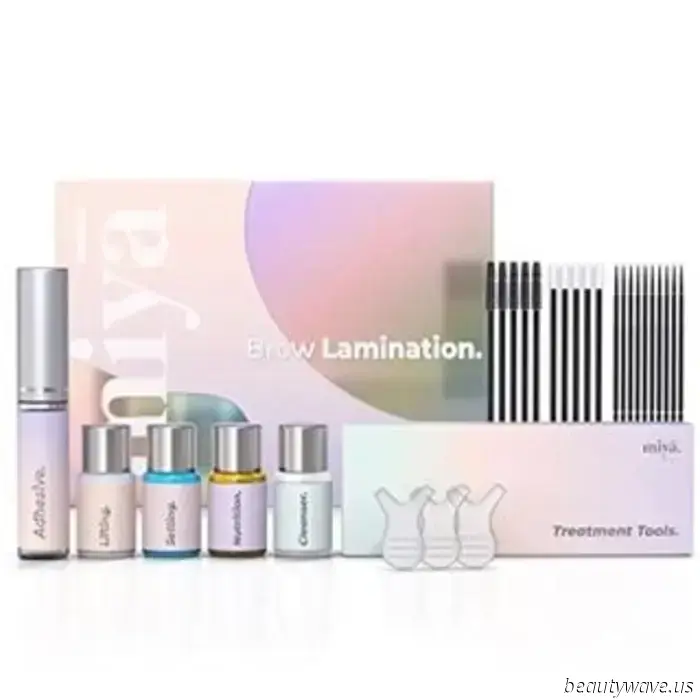
1. **Clean Your Brows**
After completing your patch test and confirming that you’re good to go, start with a clean canvas. Most brow lamination kits include a small cleanser designed to remove makeup, oil, or debris around your brows for optimal results. If you don’t have one or have run out, micellar water on a cotton pad works well too. Since I have sensitive eyes and skin, I also like to apply a bit of Aquaphor or Vaseline around the edges of my brows to protect my skin before moving on to the next step.
2. **Apply Brow Glue and Shape**
Your brow lamination kit will include brow glue (or adhesive) along with spoolie brow brushes or Y-shaped combs. This step is arguably the most important. It's about creating the shape you want to fix your brows into, so take your time until you are satisfied. Apply the adhesive to one brow at a time since it dries quickly, and use the comb or brush to shape your brow hairs. The comb gives a fluffier look by pushing the hairs flat against the skin at their full length, whereas a spoolie brush offers a softer, fluffy appearance. Depending on your desired look, you can stretch the hairs up and out for a fluffier effect or lift specific areas like the arch or front of your brow. As the brow gel dries, it will set the hairs in place and feel tacky to the touch.
3. **Apply Perming Solution**
Once you’re happy with the shape of your brows, it’s time to apply the perming solution. Most kits come with tiny applicator sticks for this purpose, but a cotton bud works just as well to evenly distribute the product. Ensure your brows are thoroughly coated with a generous layer, being careful not to disturb their placement underneath. The perming solution breaks down the protein bonds in your eyebrow hairs, representing the first phase of setting your brows. Follow your kit instructions for timing, which typically ranges from 3-8 minutes depending on your hair's thickness. Since my brow hairs are quite thick, I usually leave it on for about 6-7 minutes. If it’s your first time, start with 3-4 minutes, and if unsure, set a timer and err on the side of caution.
4. **Remove Perming Solution and Apply Fixing Solution**
When the time is up, gently remove the perming solution with a dry cotton pad (avoid water, as we don’t want to get the brows wet yet). Use the Y-shaped comb to help remove any excess product. Next, apply the fixing or setting solution, which locks the bonds in your brow hairs. As with the perming step, timings can vary, but aim to leave it on for the same duration as the perming solution (3-8 minutes based on brow thickness). Use a clean applicator or cotton bud to apply this layer.
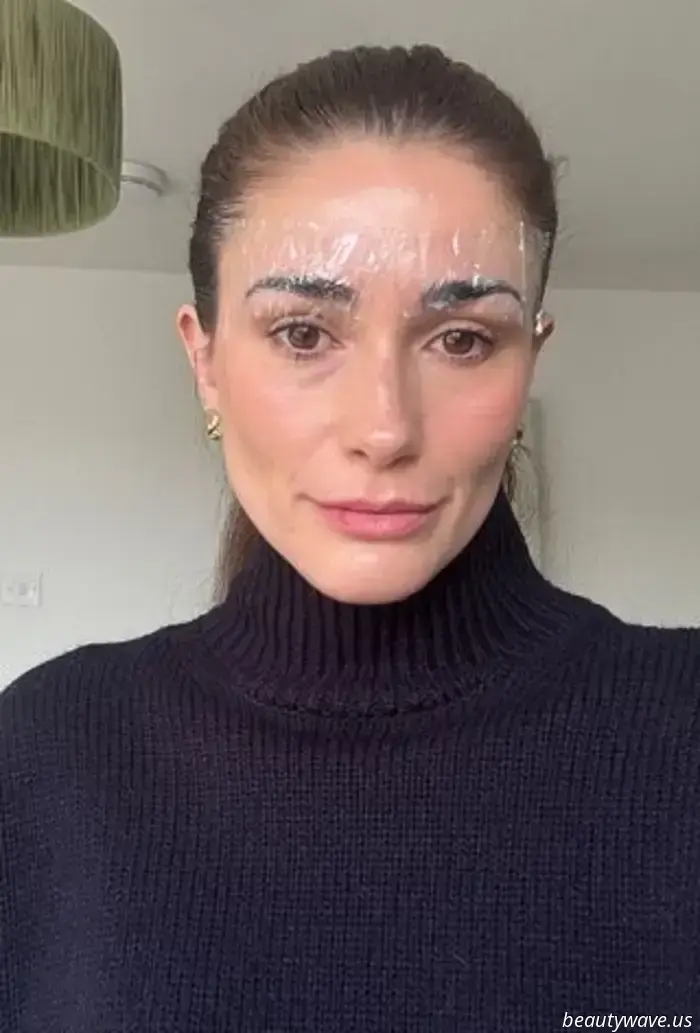
5. **Set In Place**
I know this may look silly, but many people find it helpful to place cling film over their brows while the fixing solution works to keep the hairs in position and prevent them from falling out of shape. After trying brow lamination both with and without this step, I recommend using cling film for the best results, especially if your brow hairs are thick or hard to manage. So

Other articles
 I have confidence in French women when it comes to style—they continue to sport this sophisticated outfit.
The burgundy tailoring trend is officially gaining popularity. Click to see how Elsa, Rosie, and Parisians are currently embracing this style.
I have confidence in French women when it comes to style—they continue to sport this sophisticated outfit.
The burgundy tailoring trend is officially gaining popularity. Click to see how Elsa, Rosie, and Parisians are currently embracing this style.
 Sunscreen Filters Available Internationally Are Exceptionally Effective—Here’s Why They Haven’t Made It to the U.S. Yet.
It's disappointing, yet I remain hopeful.
Sunscreen Filters Available Internationally Are Exceptionally Effective—Here’s Why They Haven’t Made It to the U.S. Yet.
It's disappointing, yet I remain hopeful.
 I Recently Transformed My Long Hair into a Bob—Here Are 7 Things I Wish I Had Known Beforehand
I don't have any regrets.
I Recently Transformed My Long Hair into a Bob—Here Are 7 Things I Wish I Had Known Beforehand
I don't have any regrets.
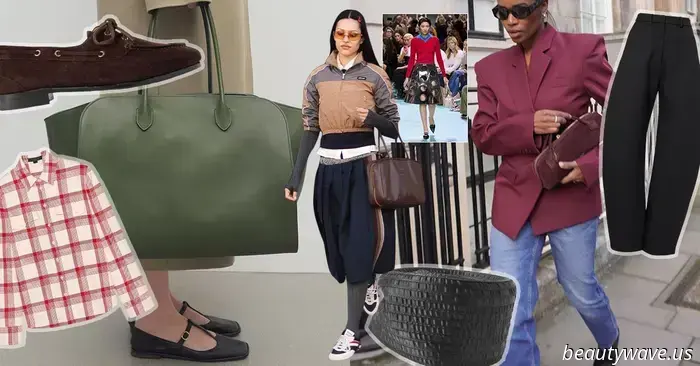 The 30 Pieces That Will Shape Spring Fashion
From Prada to Phoebe Philo.
The 30 Pieces That Will Shape Spring Fashion
From Prada to Phoebe Philo.
 Here are the 2025 versions of all the essentials your wardrobe requires.
The beginning of spring is the perfect opportunity to renew your essential wardrobe pieces for the year, so we’ve gathered the latest styles you’ll need for 2025. You can shop them here.
Here are the 2025 versions of all the essentials your wardrobe requires.
The beginning of spring is the perfect opportunity to renew your essential wardrobe pieces for the year, so we’ve gathered the latest styles you’ll need for 2025. You can shop them here.
 Discovered: The Essential Selections from Nordstrom's Spring Sale for Luxurious-Looking Attire.
All of these gems are priced below $150.
Discovered: The Essential Selections from Nordstrom's Spring Sale for Luxurious-Looking Attire.
All of these gems are priced below $150.
I Successfully Mastered At-Home Brow Lamination, and Now I'll Never Need to Purchase Brow Gel Again.
Our beauty editor experimented with brow lamination and offers her tips along with a step-by-step guide and videos for achieving brow lamination at home.